Part 2 - The repair begins
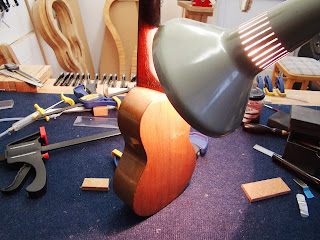
Before we can glue anything back inside the ukulele, the instrument must first be made structurally solid. And so we start with all the loose seams around the perimeter of the instrument.
The lamp provides the gentle heat which warms the instrument ready for the hide glue.
Now everything is solid, we can move onto the loose braces.
This one was loose and only held in place by the brace ends which are tucked into the linings. Since hide glue is cohesive and sticks to itself, I simply re-glued it in place. The ease of repair-ability is one of the major reasons I use hide glue exclusively in my new instruments as well as restoration work.
Same with the loose bridge.
The second top brace was completely missing, so I had to make a new one in the old style. The spruce I use in restoration came from an old piano, so it it naturally aged and a good color match to the original spruce. It is then further distressed for a perfect match.


No comments:
Post a Comment
Note: Only a member of this blog may post a comment.